Realm administration#
Intended audience
Operation Staff members
User registration#
While public user registration is available by clicking on the “Register” link from the login page, realm administrators can still manually create a new user by following that guide.
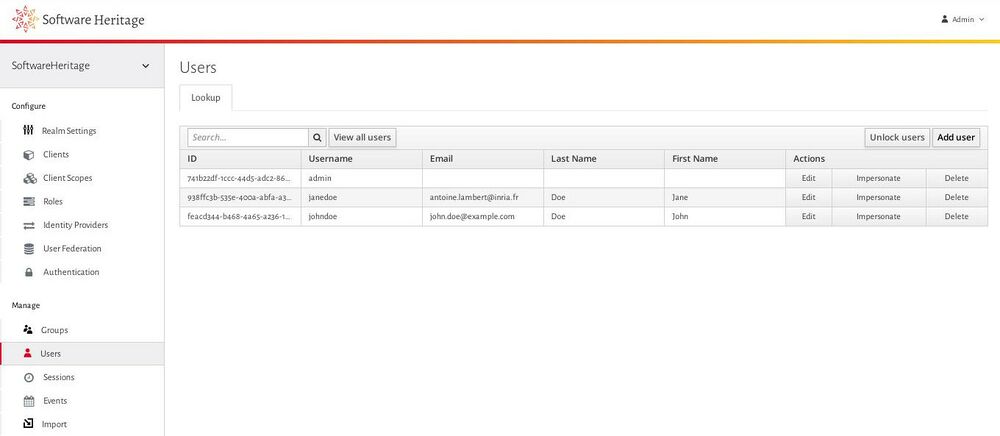
To register and invite a new user in a realm, click on the Users menu entry on the left part of the admin interface, then click on the Add user button on the top right part of the users page.
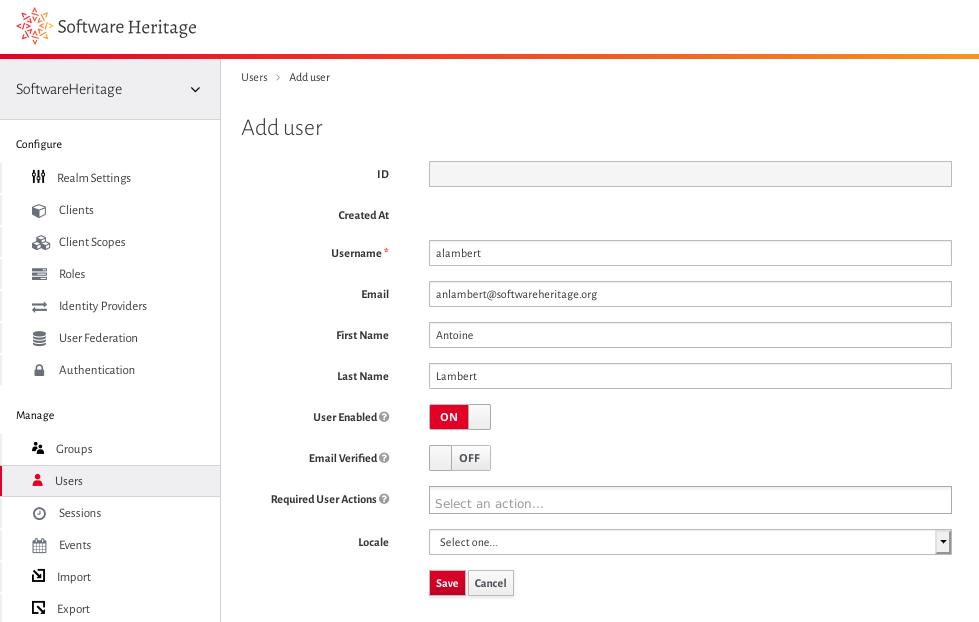
Click on the Add user button#
Then fill in the form with basic information about the user: username, email, first name and last name.
Save the user and then go to the Credentials tab.
Fill in information on user#
We are now going to send a mail to the user telling him that an account has been created for him with a link to verify his email, set his password and update its profile if needed.
Go to Credential Reset section and insert the Verify Email , Update Password and Update Profile actions into the Reset Actions field. Increase the Expires In value to 24 hours and then click on Send Mail.
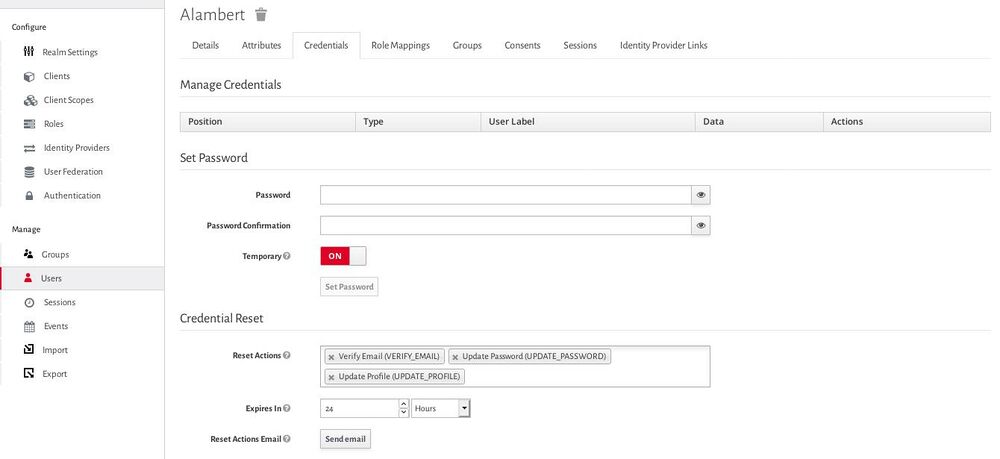
Send the invite and reset password email#
The user account will be active once the email verified, the password changed and the profile validated.
Setting user permissions for a given client#
User permissions are defined as client roles in the Keycloak semantics. That guide explains how to set client roles for an existing user.
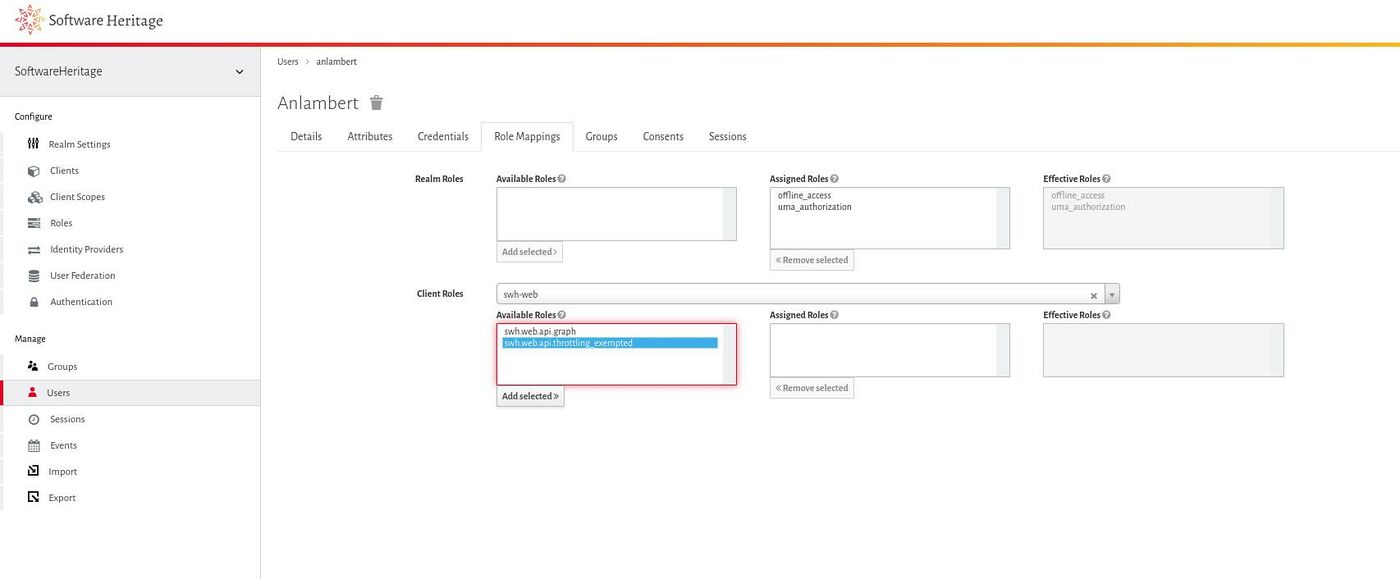
As an example, we will set the swh.web.api.throttling_exempted role associated to the swh-web client enabling to lift rate limit for the Software Heritage Web API.
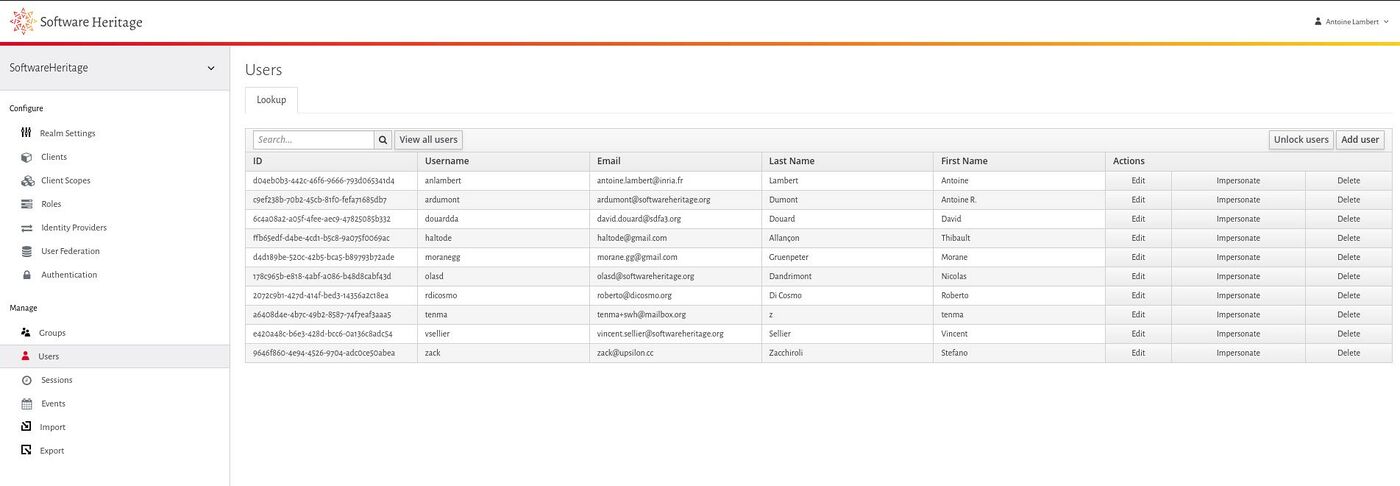
To edit a user, click on the Users menu entry on the left part of the admin interface, then click on the View all users button on the top left part of the users page.
Then select the user you want to set permission and click on the Edit action.
List and select user for edition#
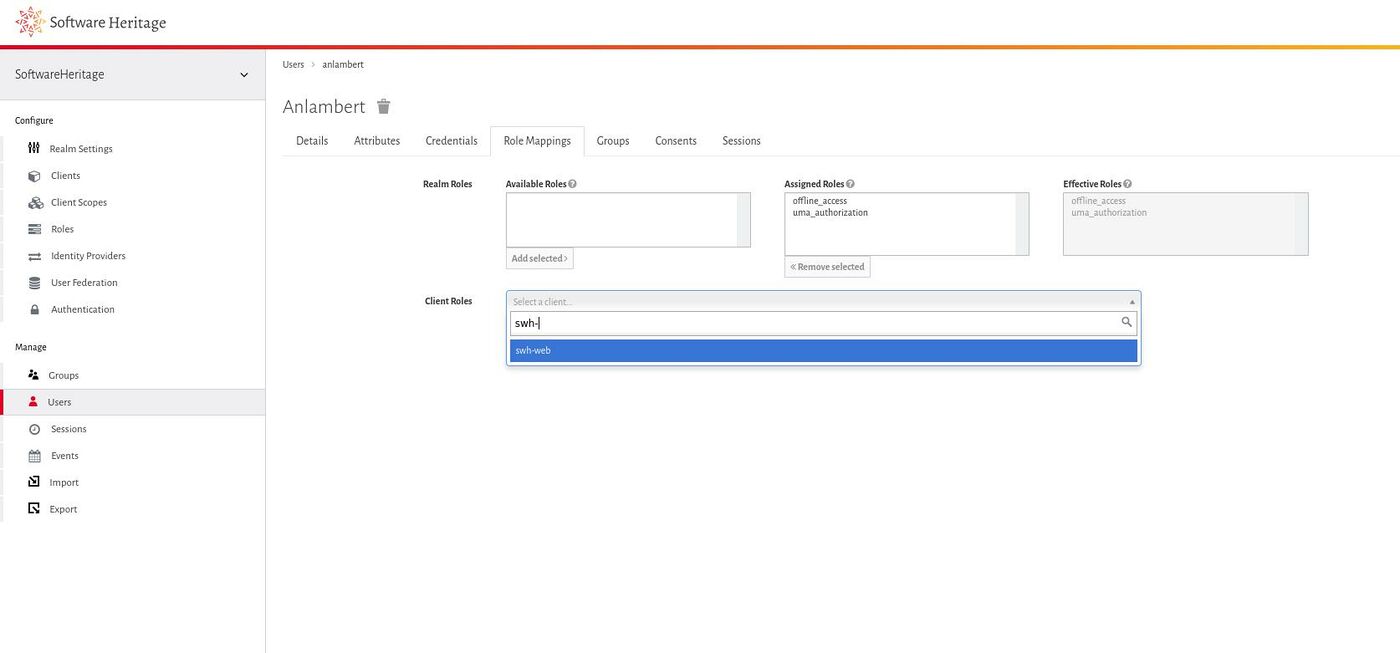
Once the user details interface is displayed, click on the Role Mappings tab then type the name of the client containing the roles to add for the user in the Client roles combobox and select it.
The client roles will then be displayed in multiple lists.
Edit the client role#
To add a client role for the user, select the one of interest in the Available Roles list and click on the Add selected button.
To remove a client role for the user, select the one of interest in the Assigned Roles list and click on the Removed selected button.
And that’s it, assigned roles can then be found in the JSON Web Tokens generated by Keycloak.
Assign client role#
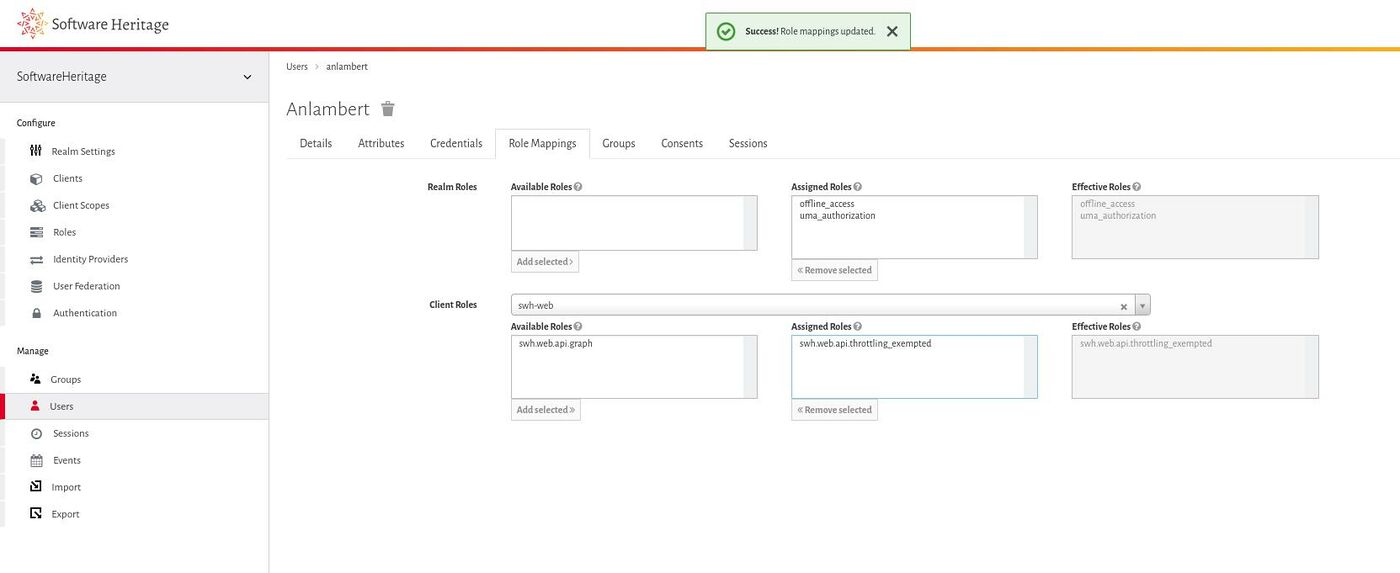
Client role assigned#